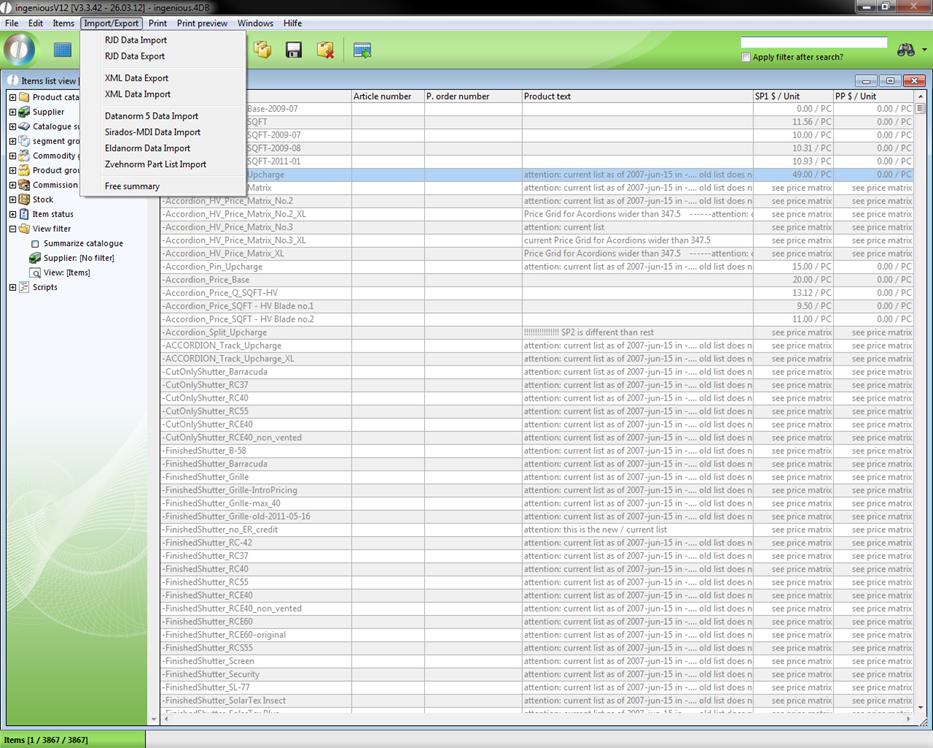
In Ingenious.V12 you have different possibilities for importing and exporting data. You will find this in the main menu of the item module under the item “Import/Export”.
RJD Data Import
RJD is the data exchange standard of the roller shutter and Venetian blinds industry. This standard simplifies the data exchange between supplier and manufacturer and your company. You can easily import item data from the manufacturer without having to create the data again yourself. If you want to have such data and include it in your database, Ingenious.V12 puts a reliable RJD Data Import function at your disposal. You will find these under the menu option “Import/Export/RJD Data Import” of the main menu. First, the following reference display window appears.

Main menu of the RJD Import function
RJD Data Export
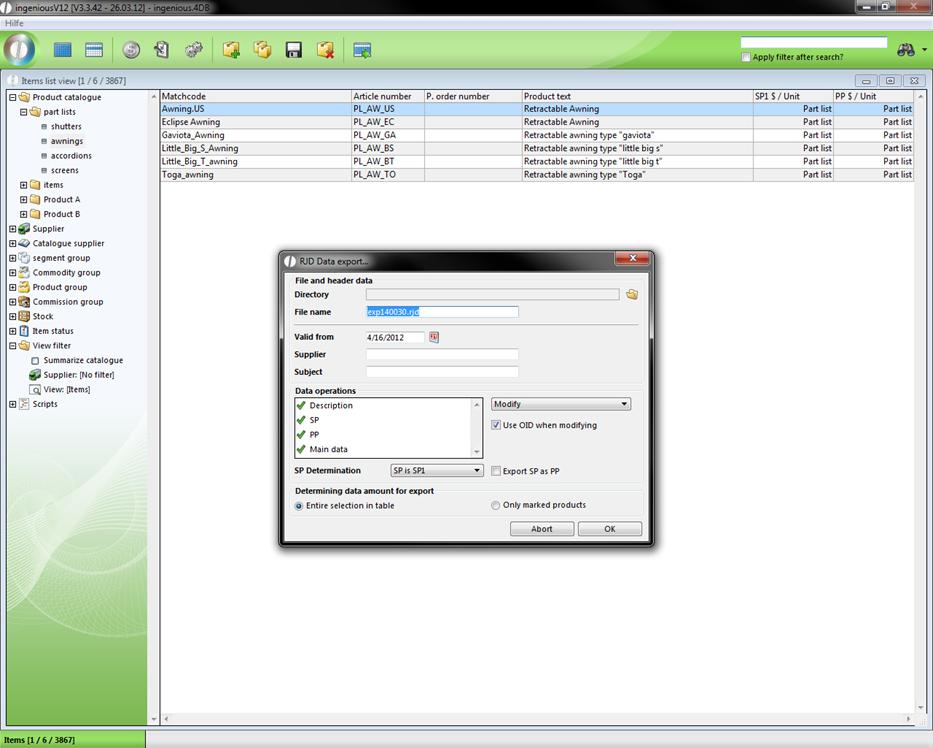
If you want to provide RJD Data yourself and make it available to other people (Interested parties, contacts), the RJD Data Export function in Ingenious.V12 can help you. This is found in the main menu under the entry “Import/Export/RJD Data Export”.
Main menu of the RJD Export function
XML Data Export
If you click on the XML Data Export on the new sub item, “XML Data Export” a dialog window opens. Here you can activate the parameter “Compatibility Export “, which makes a reading of the XML document into another software program possible. In addition, if item data are handed over to retailers, SP prices can be transferred as PP prices for example.
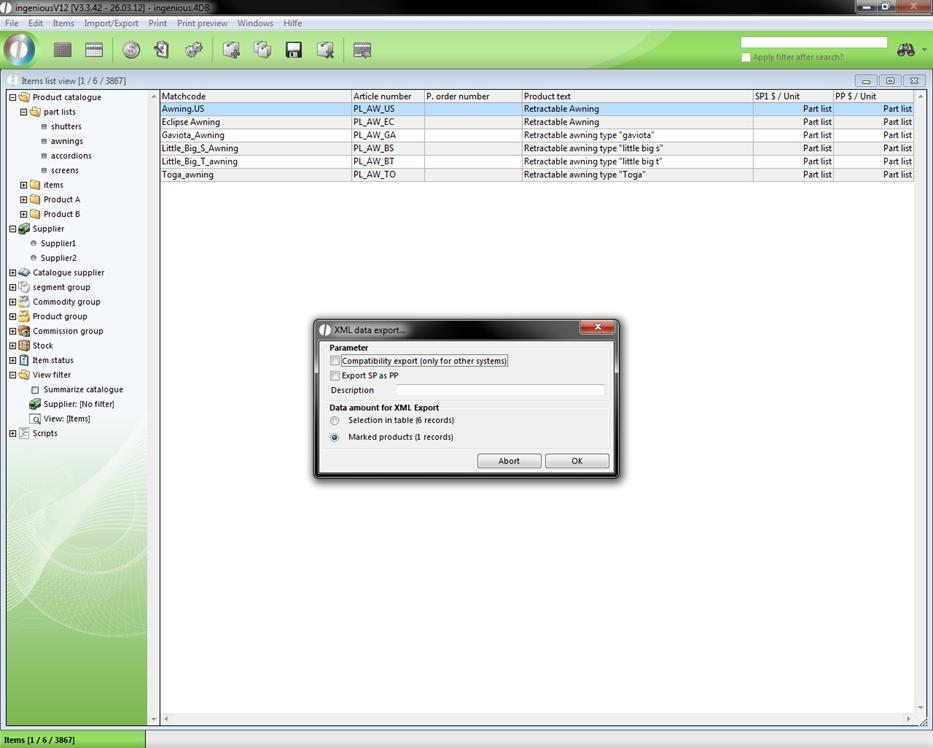
After the confirmation, a standard dialog window from Windows appears in order to save files. You can now select the desired path and designate the file and then data are stored as an XML file.
XML Data Import
Before you start the XML Data Import, you should have only marked the desired item listing. In the standard dialog of Windows you then only select the file that you want to import.
Data Standard 5 Data Import, Sirados-MDI Data Import, Eldanorm Data Import and Zvehnorm Data Import
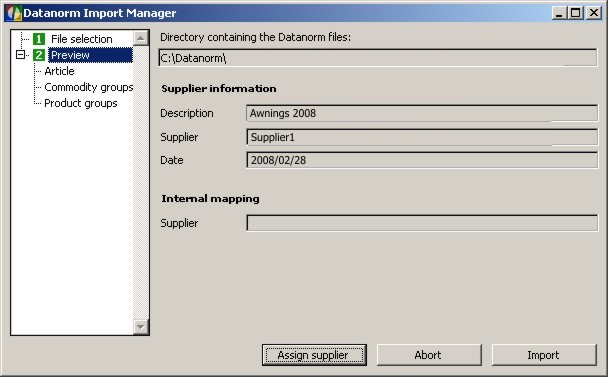
The Data Standard 5 Data Import functions, Sirados MDI Data Import, Eldanorm Data Import and Zvehnorm Data Import of Ingenious.V12 represent interfaces for a simple item exchange between the specialized wholesaler, the manufacturers and the assembly trade. Thanks to the interfaces, trade enterprises can quickly and easily transfer many supplier product catalogues to Ingenious.V12. The items can contain a variety of information such as descriptions, pictures or complex parts lists. They are automatically arranged during the import in the product and commodity, and provided with personal discounts. The Data Standard Import function is the most common data communication mode. It saves the tedious work of creating all items manually. When you open the function, the following window opens, in which you only select the listing with the Data Standard Files in the top section.
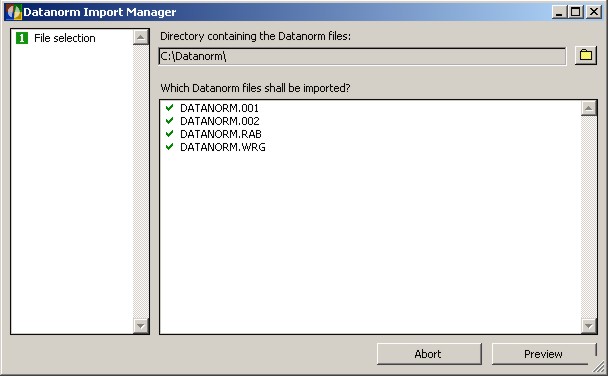
The import manager now automatically provides you with a list of the possible import files and you can select the desired files by double-clicking. Now you still assign the suppliers and import the file.
The Sirados MDI Data Import, the Eldanorm Data Import and the Zvehnorm Data Import, function similarly to the Data Standard Data Import.
Free Summary
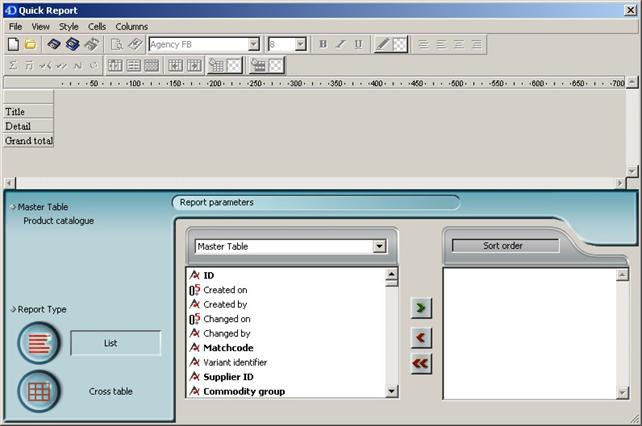
Note: The chapters on the Free Summary in the modules “Contacts” and “items” are identical. In order to also use your data from Ingenious.V12 in other applications, Ingenious.V12 offers you the easy Export Function, “Free Summary” (This is also party used under the term ASCII Export in the user administration, for example). If you click on the menu option, “Free Summary”, the so-called Quick Report, consisting of three main data areas, opens.
View of the export function
Notes:
A) Everything that is found in the selection area can be exported.
B) Everything that is found in the export area will be exported.
C) One can sort the data to be exported in the sort area.
Practice using the Free Summary
In this exercise, all files from the item listing, “8. Motors - motors” are to be exported into the Microsoft Excel program. In addition, you should still sort the export according to the item number.
1. Click on the folder “8. Motors - motors” in order to open the files to be exported.
2. In the main menu, select the entry, “Import/Export - Free summary”. In the print dialog window that appears, select the option, “All Selected” and confirm this with the “OK” button.
3. In the Quick Report window, you bring the fields “Matchcode”, “item number”, “Purchase price” and “1.Selling price” from the selection area into the export area. You have two possibilities for this. You either double click on the corresponding fields or you pull the fields with the mouse (Called Drag & Drop) from the selection area into the export area!
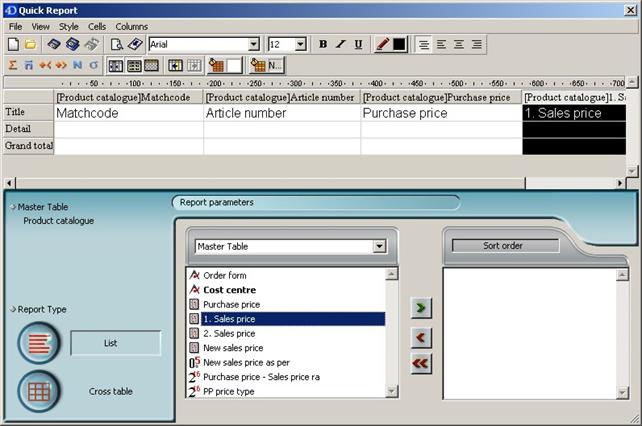
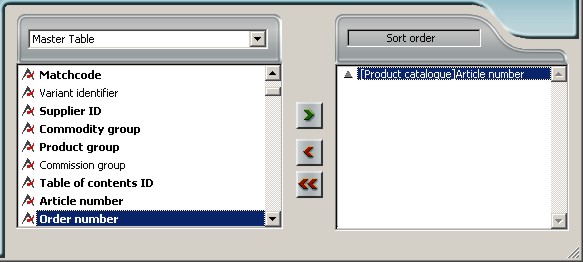
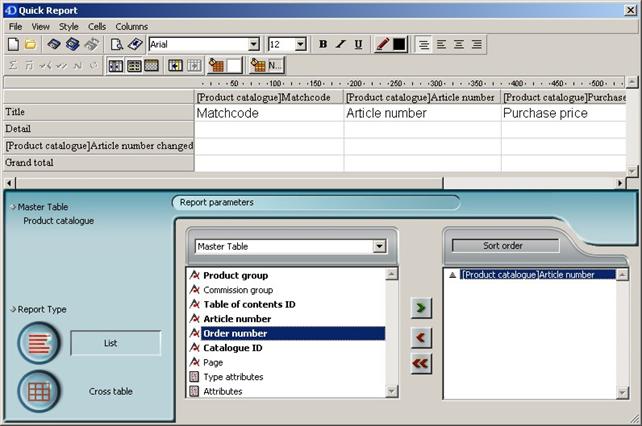
4. Sort your export according to the item number. Either pull the field “Item Number” using the Drag & Drop function into the sort area, or highlight the field and then click on the ![]() button to transfer the field.
button to transfer the field.
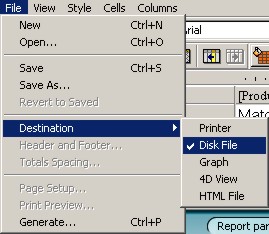
5. In the menu, select the entry, “File/Destination/Disc File”.
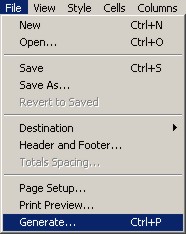
6. In the menu, select the entry “File/Create…”.
7. The standard Windows dialog appears in order to save the data. Select a path and enter, “Export1”.
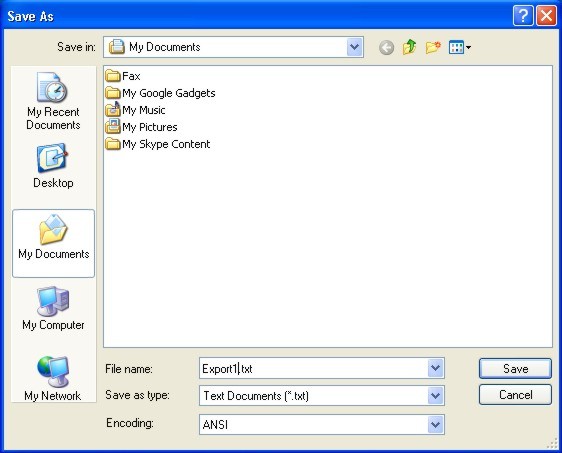
Windows standard dialog
8. After you saved the data, and if you don’t want to export anything else, you can close Quick Report.
9. Start the “Microsoft Excel” program on your PC and select the menu item “File/Open”.
10. The Windows standard window appears to open files. Search for the file that is to be exported., “Export1.txt” and open it.
11. The “Text Converter Assistant” in “Excel” appears.
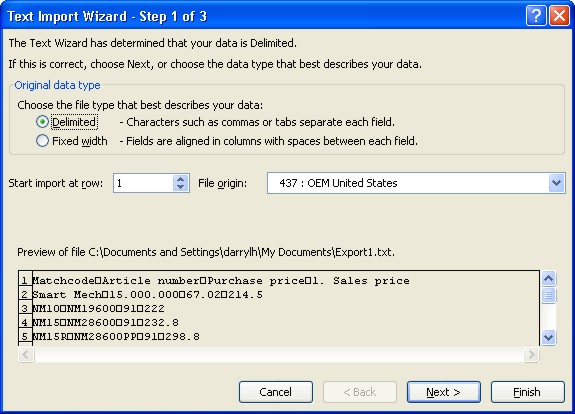
12. Leave the standard settings as they are and click on the “Finish” button.
Your Excel spreadsheet will look as follows.
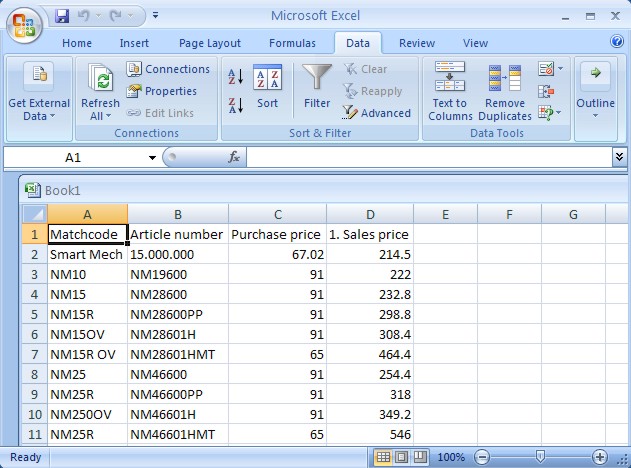
As you can see, the selected files are listed among each other with the respective column description located at the top line of the table. Since the terraces contain Awnings Cap and Cap_d price matrices, these are also listed. All items are sorted in ascending order according to the item number. With the help of the text file (*.txt) you can now import your data now into every other program without problems, in order to work on it further. Of course the “Free Summary” function offers you even more. This is how you can also sort your export according to hidden, non-visible fields.
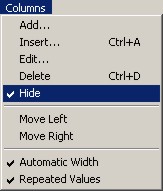 In order to do this, you must only hide the field that is not to emerge afterwards in the exported file. This happens within the export area. Simply right click on the appropriate field and select the entry, “Hide” from the context menu that now appears. As a distinguishing feature, the field is now covered now with a grey diamond grid. In the exported file, the hidden field does not appear anymore, but it will still be sorted afterward.

In the export function, you can also specify if you want to sort in ascending or descending order. In order to do this, it is sufficient to click on the triangle next to the field that is to be sorted in the sort area.